Welcome to the enchanting world of creativity, where every stroke tells a story! In today’s blog post, we’re diving into a captivating drawing project that combines elegance and imagination: “drawing:kkbuebxxlzy= rose.” Whether you’re an aspiring artist or simply someone who appreciates the beauty of art, get ready to explore the intricate details and vibrant colors that make roses so timeless. From tips on capturing their delicate petals to techniques for infusing your unique style into this classic subject, we’ll guide you through each step of creating your very own stunning rose illustration. So grab your sketchbook and let’s unfold the magic together—because every great artwork begins with a single line!
Introduction to drawing and its benefits
Drawing is more than just putting pencil to paper; it’s a form of expression that can transport you to another world. Whether you’re an aspiring artist or someone who simply enjoys doodling in the margins, every stroke has its own story. Among all subjects, roses stand out as timeless symbols of beauty and emotion. They capture hearts with their elegance and complexity.
In this post, we’ll dive into the enchanting realm of creating your very own “drawing:kkbuebxxlzy= rose.” With each petal and thorn you sketch, you’ll discover not only the joy of drawing but also a deeper connection to one of nature’s most exquisite creations. So grab your art supplies and get ready to unleash your creativity!
What is a Drawing:kkbuebxxlzy= rose
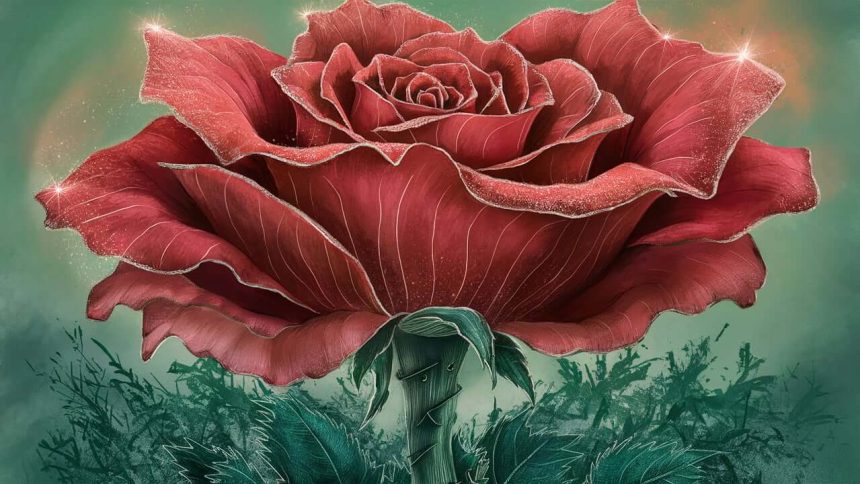
A “drawing:kkbuebxxlzy= rose” is a creative concept that blends traditional artistry with modern digital expressions. This term captures the essence of drawing roses in unique and inventive ways.
It often refers to a specific style or technique used to depict roses, emphasizing individuality. Artists can play with colors, shapes, and line work to create something distinctive.
These drawings might incorporate abstract elements or surreal interpretations, moving beyond realistic representations.
The beauty of a “drawing:kkbuebxxlzy= rose” lies in its freedom for personal expression. Each artist brings their perspective, turning simple floral imagery into extraordinary pieces of art that resonate on multiple levels.
Whether you’re sketching on paper or exploring digital platforms, the possibilities are endless when it comes to this captivating subject.
Materials needed for drawing a rose
Creating a beautiful rose drawing starts with the right materials. You don’t need an elaborate setup, just a few essentials to get you going.
A good quality sketchbook or drawing paper is your foundation. Look for something thick enough to handle various mediums without bleeding through.
Next, grab some pencils. A range from 2H (for fine lines) to 6B (for rich dark shades) will give you flexibility in shading and detail work.
An eraser is crucial too. A kneaded eraser works wonders for lifting graphite and creating highlights without damaging your paper.
If you’re feeling adventurous, consider colored pencils or watercolors for a vibrant touch. They can add life and dimension to your rose!
Lastly, remember that blending stumps are handy tools. They help smooth out pencil marks and create soft transitions between shades for that realistic look you’re aiming for.
Step-by-step guide on how to draw a rose
Start by sketching a small circle at the center. This will be the heart of your rose.
Next, draw several petal shapes around the circle. They should look like rounded teardrops, overlapping slightly for a natural effect.
Now, add more petals. Make them larger and vary their sizes to create a fuller bloom. Focus on how they curl outward as they open.
Once you’re satisfied with the shape, refine your lines. Smooth out any rough edges and emphasize curves for realism.
After that, sketch a stem extending from the base of your flower. Don’t forget to add leaves! Draw simple oval shapes along either side of the stem.
Finally, go over your drawing with darker lines or ink it in if desired. You can erase any unnecessary pencil marks afterward to clean up your artwork.
Tips and techniques for adding depth and texture to your drawing
To bring your drawing of a rose to life, focus on adding depth and texture. Start with layering your shades. Use lighter tones where the light hits and darker shades in shadowed areas.
Experiment with different pencil techniques such as hatching or cross-hatching. These methods can create intricate textures that mimic the delicate petals of a rose.
Don’t forget about blending tools like tortillons or even your fingers for softer transitions between colors. They can help smooth out harsh lines, giving a more realistic look.
Incorporate fine details by using an eraser to lift color in specific areas, creating highlights that enhance dimension.
Finally, observe real roses closely; note how they naturally curve and fold. This understanding will guide you in achieving a lifelike representation in your artwork.
Inspiration and ideas for different styles of rose drawings
Exploring different styles of rose drawings opens up a world of creativity. From realistic portrayals to abstract interpretations, the possibilities are endless.
Consider trying a watercolor technique for a soft, dreamy effect. The gentle blending of colors can bring your roses to life in unexpected ways.
If you lean towards minimalism, simple line art can be striking. Fewer strokes often convey more emotion and elegance, making each line significant.
For those who appreciate boldness, experiment with pop art styles. Bright colors and exaggerated forms add an energetic flair that captures attention instantly.
Additionally, try combining mediums—pencil shading paired with ink outlines creates depth while maintaining clarity.
Even incorporating elements like geometric shapes or patterns around your rose can provide an exciting contrast and make your artwork unique. Each style offers its own charm; let inspiration guide you as you explore!
Common mistakes to avoid when drawing a rose
When diving into drawing a rose, many beginners fall victim to some common pitfalls. One such mistake is neglecting the proportions. Roses can appear disproportionate if the petals are uneven or too large compared to the stem.
Another frequent error involves skipping foundational shapes. Instead of jumping straight into details, sketch simple outlines first. This step helps establish structure and makes it easier to refine later.
Additionally, be wary of over-complicating your shading techniques. Relying on heavy shadows can flatten your image rather than add depth. Lightly layering tones often results in a more realistic appearance.
Lastly, don’t forget about perspective! A rose viewed from an angle will look different than one seen head-on. Paying attention to these aspects can significantly enhance your artistic expression and confidence when creating a “drawing:kkbuebxxlzy= rose.”
Conclusion
Creating your own “drawing:kkbuebxxlzy= rose” offers a unique opportunity to express yourself. The process of drawing enhances not just artistic skills, but also patience and focus. Each stroke of the pencil brings you closer to capturing the essence of this beautiful flower.
As you embark on your journey, remember that art is subjective and personal. Embrace your creativity and let it blossom in unexpected ways. Experiment with different techniques, styles, and materials to find what resonates with you.
Whether you’re a beginner or an experienced artist, each rose drawn tells a story—the story of growth, beauty, and individuality. So pick up that pencil or brush today and start crafting your very own masterpiece!